Ooooooooo, lets have some bread....
Toast it, smear it with butter, make a sandwich, whatever. Breads great.
Basic bread....
Baking your own loaf is such a rewarding, therapeutic, tactile thing and you'll be so proud of yourself once you've cracked it. Plus you can’t beat the smell of freshly baked bread wafting through the kitchen!
Ingredients |
Cooking stuffBread baking tin
mixing bowl |
OvenPreheat the oven to 225ºC/425ºF/gas 7
|
The recipe....
1. Add the honey and yeast to the tepid water and leave for a couple of minutes until it starts bubbling
2. Pile the flour and 2 teaspoons sea salt into a large bowl and make a well in the centre
3. Pour half of your yeast mixture into the well, and use a fork to gradually bring the flour in from the outside
4. Once you get a stodgy, porridge consistency, add the rest of the mixture and gradually incorporate all the flour to make a smooth dough
5. Dust a clean work surface and your hands with flour, then knead the dough, pushing, folding and pulling it with your hands, for about 5 minutes until it’s
silky and elastic
6. If any of the dough sticks to your hands, just rub them together with a little extra flour
7. Lightly flour the top of the dough, make it into a roundish shape and place on a baking tray
8. Deeply score the dough with a knife – allowing it to relax and prove with ease
9. Leave it to prove in a warm, moist, draught-free place for about 40 minutes until it’s doubled in size
10. At this point you need to knock the air out of it by bashing it around for another minute
11. Shape the dough into the loaf shape you want, sprinkle generously with flour then leave to prove once more, until it doubles in size again
12. Preheat the oven to 225ºC/425ºF/gas 7
13. After all your hard work, don’t spoil your efforts – you want to keep all the air inside the loaf, so don’t knock it
14. Gently place the tray in the preheated oven, and don’t slam the door
15. Bake for 20 to 25 minutes, until golden
16. You can tell if your bread is cooked by tapping its bottom – if it sounds hollow it’s cooked, if it doesn’t then pop it back in for a little longer
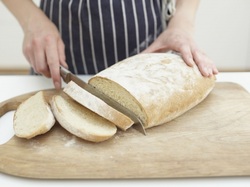
17. Transfer it to a wire rack to cool before tucking in
2. Pile the flour and 2 teaspoons sea salt into a large bowl and make a well in the centre
3. Pour half of your yeast mixture into the well, and use a fork to gradually bring the flour in from the outside
4. Once you get a stodgy, porridge consistency, add the rest of the mixture and gradually incorporate all the flour to make a smooth dough
5. Dust a clean work surface and your hands with flour, then knead the dough, pushing, folding and pulling it with your hands, for about 5 minutes until it’s
silky and elastic
6. If any of the dough sticks to your hands, just rub them together with a little extra flour
7. Lightly flour the top of the dough, make it into a roundish shape and place on a baking tray
8. Deeply score the dough with a knife – allowing it to relax and prove with ease
9. Leave it to prove in a warm, moist, draught-free place for about 40 minutes until it’s doubled in size
10. At this point you need to knock the air out of it by bashing it around for another minute
11. Shape the dough into the loaf shape you want, sprinkle generously with flour then leave to prove once more, until it doubles in size again
12. Preheat the oven to 225ºC/425ºF/gas 7
13. After all your hard work, don’t spoil your efforts – you want to keep all the air inside the loaf, so don’t knock it
14. Gently place the tray in the preheated oven, and don’t slam the door
15. Bake for 20 to 25 minutes, until golden
16. You can tell if your bread is cooked by tapping its bottom – if it sounds hollow it’s cooked, if it doesn’t then pop it back in for a little longer
17. Transfer it to a wire rack to cool before tucking in
| bread.pptx |
